My family isn’t at all French. We’re probably 75% Cornish and 25% Norwegian. The meal I most requested from my grandmother, a truly wonderful southern cook, was Chicken Fricassee though. Or that’s what she called the bone in chicken in gravy, cooked in a bag if memory served, over rice that she whipped up to my constant demands. I’ve chased whatever that was for my entire adult life, though I don’t frankly remember very much about it except how satisfied it made me feel. It was hearty, and savory, and like any good southern girl “smothered” is my favorite adjective. This is my version.
6 bone in, skin on chicken thighs patted dry w/ paper towel 2 tbs bacon fat 2 leeks, quartered/rinsed/sliced 16 oz button mushrooms, quartered 1 tbs dijon mustard 2 lemons, juiced 4 cups chicken stock salt and pepper to taste 1/2 cup heavy cream 2 tbs cornstarch in 2 tbs water slurry 1/3 cup chopped tarragon
Set a straight sided sauté pan on a medium heat. Liberally season the chicken thighs on all side. Add bacon fat to pan and allow to render. Then place the thighs, skin side down in the fat. Brown them on all sides until a deep mahogany color forms. Also great… encourage that brown-ness on the bottom of the pan. That’s the flavor.
Remove browned thighs to a plate and add the diced/cleaned leeks. Soften the leeks, then add the mushrooms until they’re also browned. Sometimes I need to lid the pan w/ the leeks and sometimes not. Just don’t let them burn. Drizzle in a little more bacon fat or butter if necessary to keep it all from sticking. Squeeze in the lemon juice to deglaze, then add the stock and mustard. Let that come to a boil and reduce slightly. Add S&P, and cream. Add the starch/water slurry and stir until uniformly thick.
Add the browned chicken back to the pan with the skin side up. The darkly colored tops should sit proud of the liquid. Put the lid on and cook on low, just barely a simmer, for 20 minutes. Remove the lid and cook another 5 or 10 minutes. Sprinkle with tarragon.
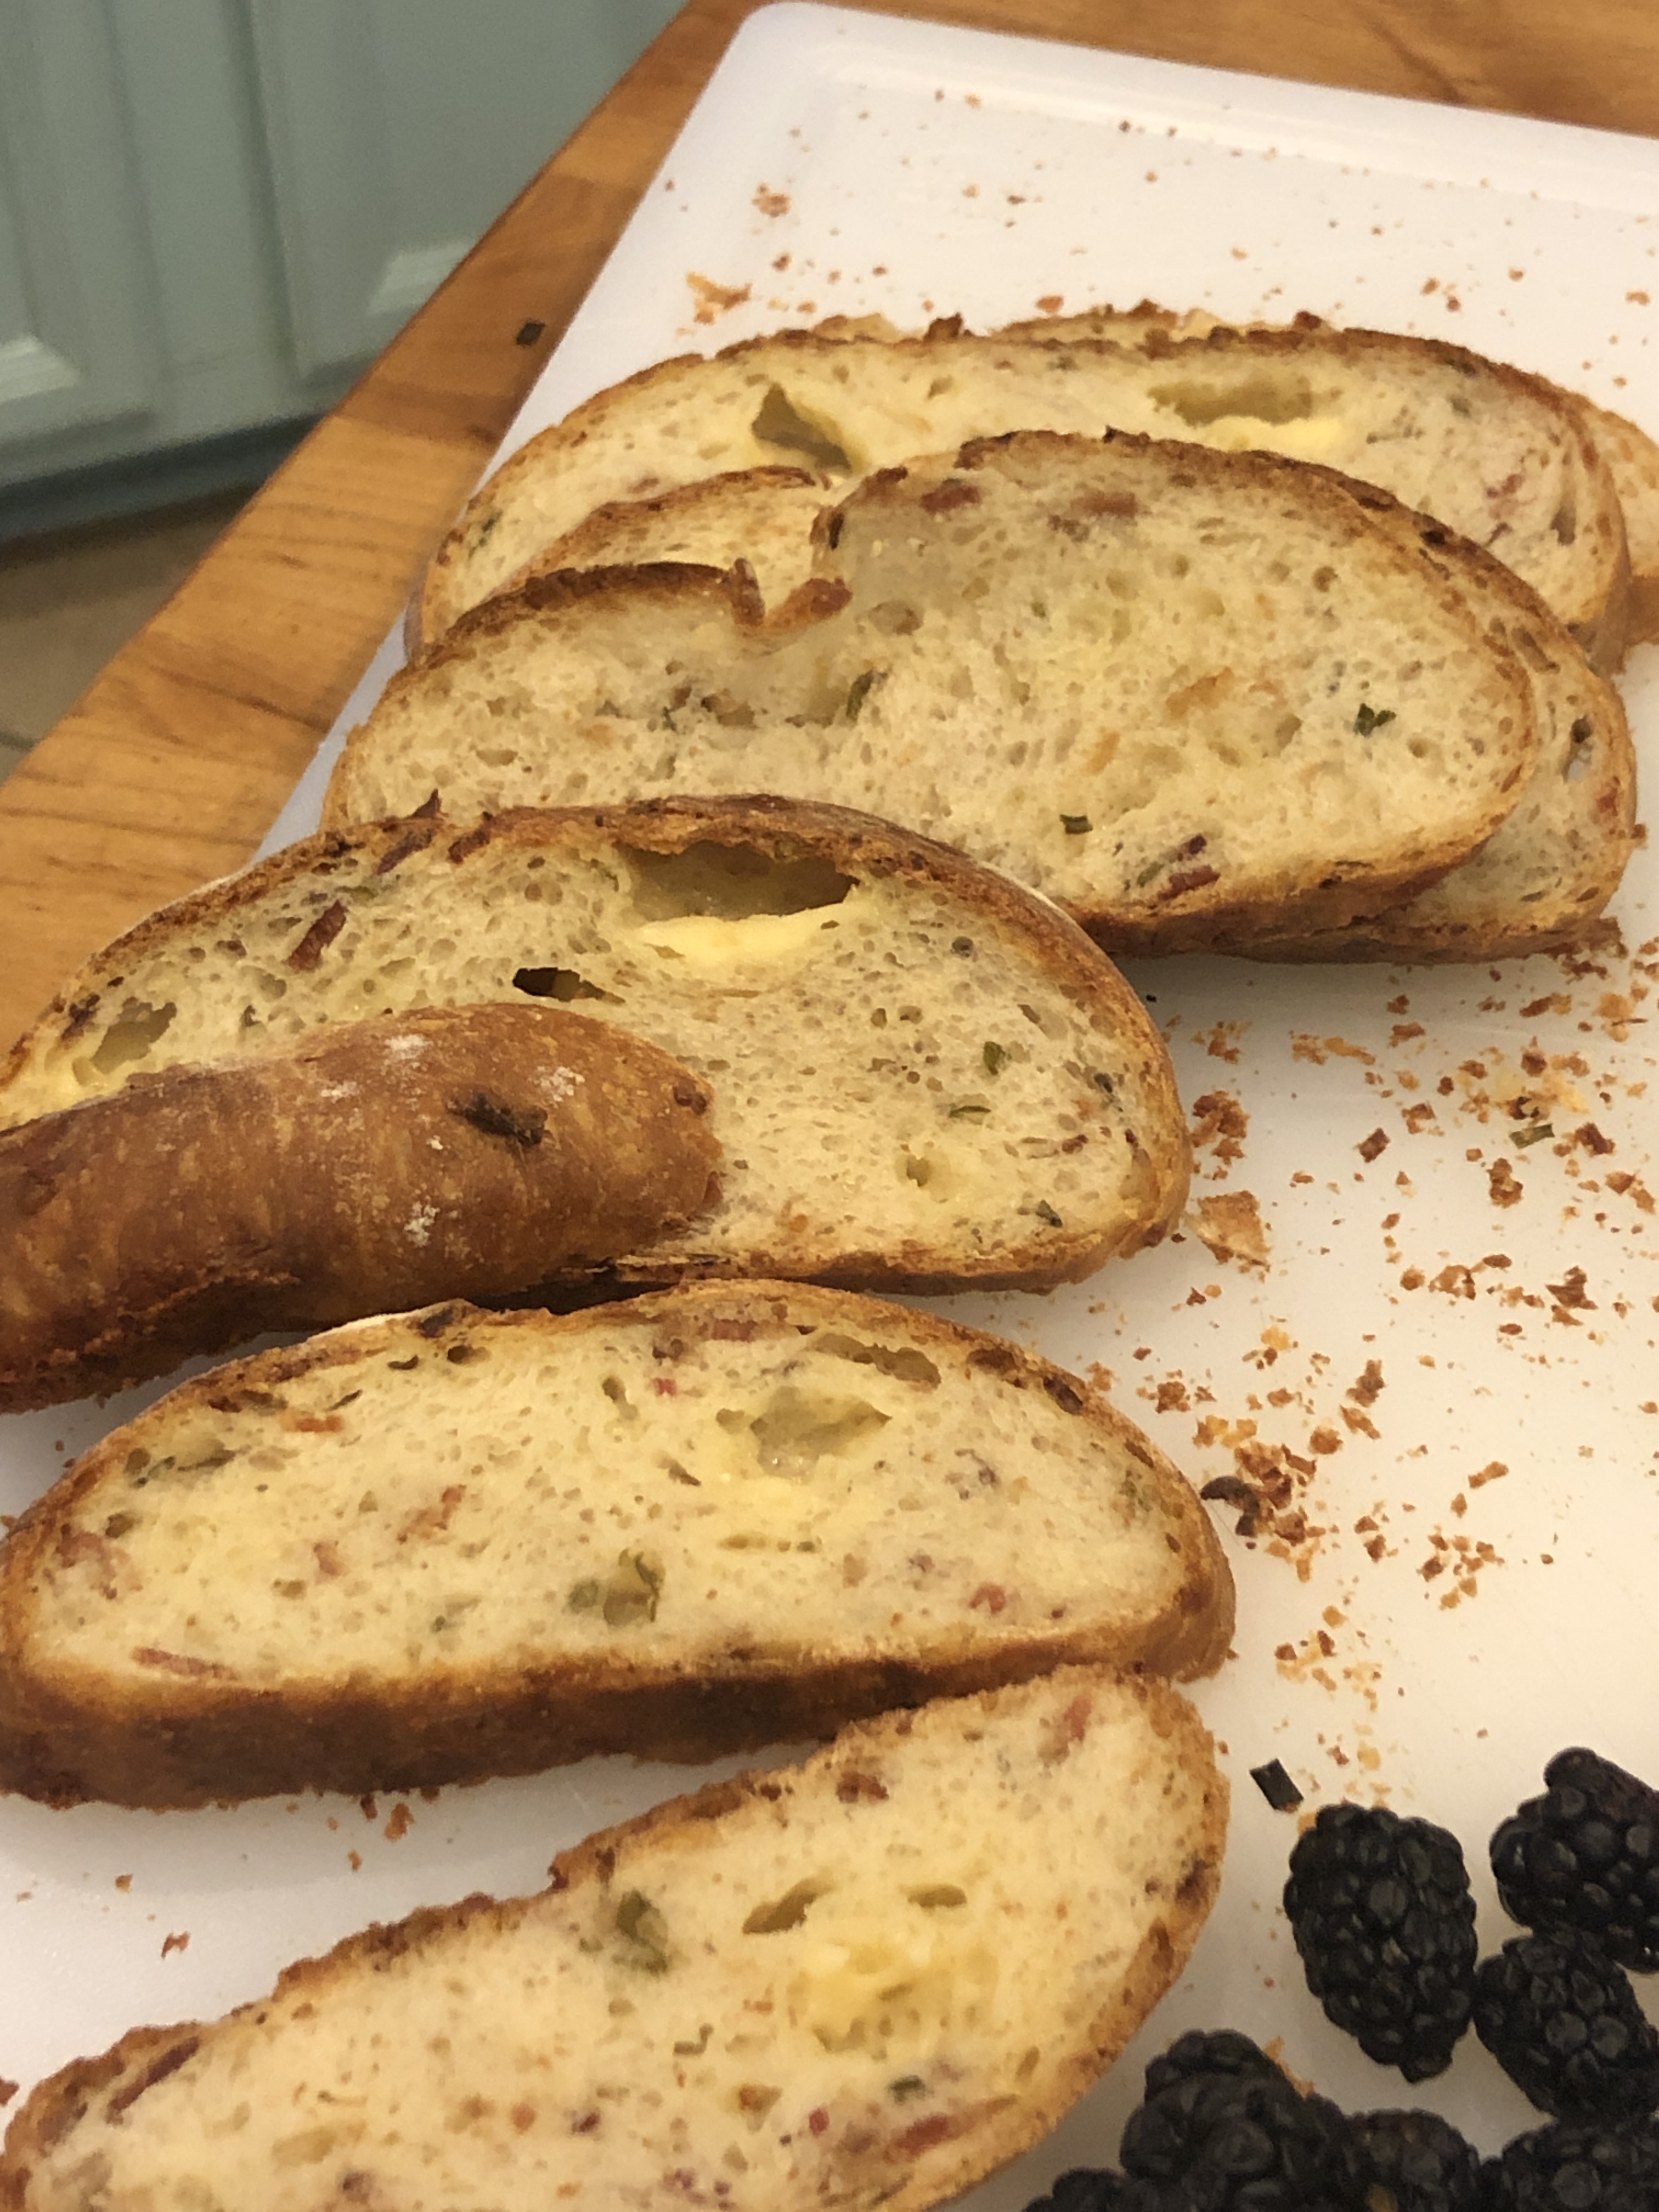
Once a week, we have bread and butter plus whatever little noshes I have around. The bread always starts with an adapted version of the King Arthur Flour Cookbook‘s Crusty Italian Loaf. I use half bread flour though, and bake my loaves (usually 2) in a dutch oven rather than braiding anything. Starting the preferment- the biga- overnight, makes the process a day and a half long project but it’s not very hands on. The flavor is great and it has a nice open crumb. Plus you can add whatever you like. A favorite is dried cranberries, walnuts, and white chocolate. Cheese and jalapeño hits the spot. Tonight was cheddar, bacon, and chives. Smeared with a little butter, it tastes like everything I want in a loaded baked potato.
A note on the cheese: You really do want to leave it in chunks. If it’s shredded or in small pieces it will disappear into the dough and just leave you with a sort of cheddar flavor and it will soften the bread a lot.
For the biga: 2 cups all purpose flour 1 cup plus 2 tbs cool water 1/8 tsp active dry yeast
For the dough: 2-2.5 cups bread flour 1/2 cup water 2 tsp yeast 1 heaping tsp salt (probably more 2 in my house bc I feel like bread needs salt) 6 oz aged white cheddar, large (3/4 inch) cubes 10 strips crispy bacon, chopped or crumbled 2-3 tbs chopped chives.
On the night before you wish to eat your bread, mix the bigga ingredients in the bowl of your stand mixer. Just use your hands or a rubber spatula. It will be thick and pretty shaggy looking. Cover it with a shower cap or plastic wrap and then let it sit in your warmish kitchen over night. The longer it sits on the counter, the more flavorful the bread will be.
The next day: add the cool water, 2 cups flour, yeast, salt, cheddar, bacon, and chives to the bigga. Turn on the mixer and allow the ingredients to mix at a 1 or 2 speed until it just cleans the sides of the bowls. Add the rest of the flour in small amounts if it’s too sticky. I don’t really work the dough at all at this stage. It’s together in a ball, but it’s not stretchy.
Remove the dough ball from the bowl and let it rest on the counter while you wash, dry, and very lightly oil the bowl. I’ve never needed flour on the counter at this stage. Then put the dough ball back in and cover it again. Set a timer for about 40 minutes. By that time, the ball should have sort of loosened up and gotten a little bigger. Wet your hand, then slide it under the dough, scoop/stretch the dough from the bottom and sort of fold it over the top. Vaguely like this. Do that 4 or 5 times, working around the dough ball. Re cover, let it rise another 40 minutes, and then repeat. Leave the dough to rise for another 30 minutes. Were I making just a plain bread, I would reduce each of those 40 minutes to 30…. the add ins will weigh down the dough and it will take longer to rise. You’ll notice these loaves aren’t particularly tall… another consequence of the additions.
Next, shape your bread. May I suggest youtube for tips, bc there’s no way I can accurately describe it? There are 10,000 ways to shape but I generally cut the dough roughly in half and make two loaves. 1’s a boule and 1’s an oblong simply because those are the bannetons I have. Leave these two loaves to rise, covered, for about 75 minutes. I’ve also done just one large boule in the round banneton and increased the rising time to about 90 minutes. You would also need to bake it significantly longer.
While the loaves are rising, place your dutch oven with it’s lid in the oven and heat to 450.
When the loaves have risen, place one in the fridge to cook after the first. I make a parchment sling and turn my loaf out onto it from the banneton. Then slice a cross in the top. Remove the dutch oven from the oven. Working very quickly, place the loaf (seam side down) into the dutch oven. Replace the lid, and put the whole thing in the oven. Set a timer for 20 minutes. Remove the lid then bake until golden brown, about 15-20 minutes. Remove the bread and allow it to cool on a wire rack while you repeat with the refrigerated loaf. Allow loaves to cool totally before cutting. I find it much easier to turn the loaf on it’s side and cut, rather than attack from the top.
The end result is a loaf w/ a crunchy crust that tastes slightly of cheese, an open crumb w/ little pools of cheddar remaining, and a nice smokey bacon flavor. We ate it off a cutting board piled w/ fruit and deviled eggs.
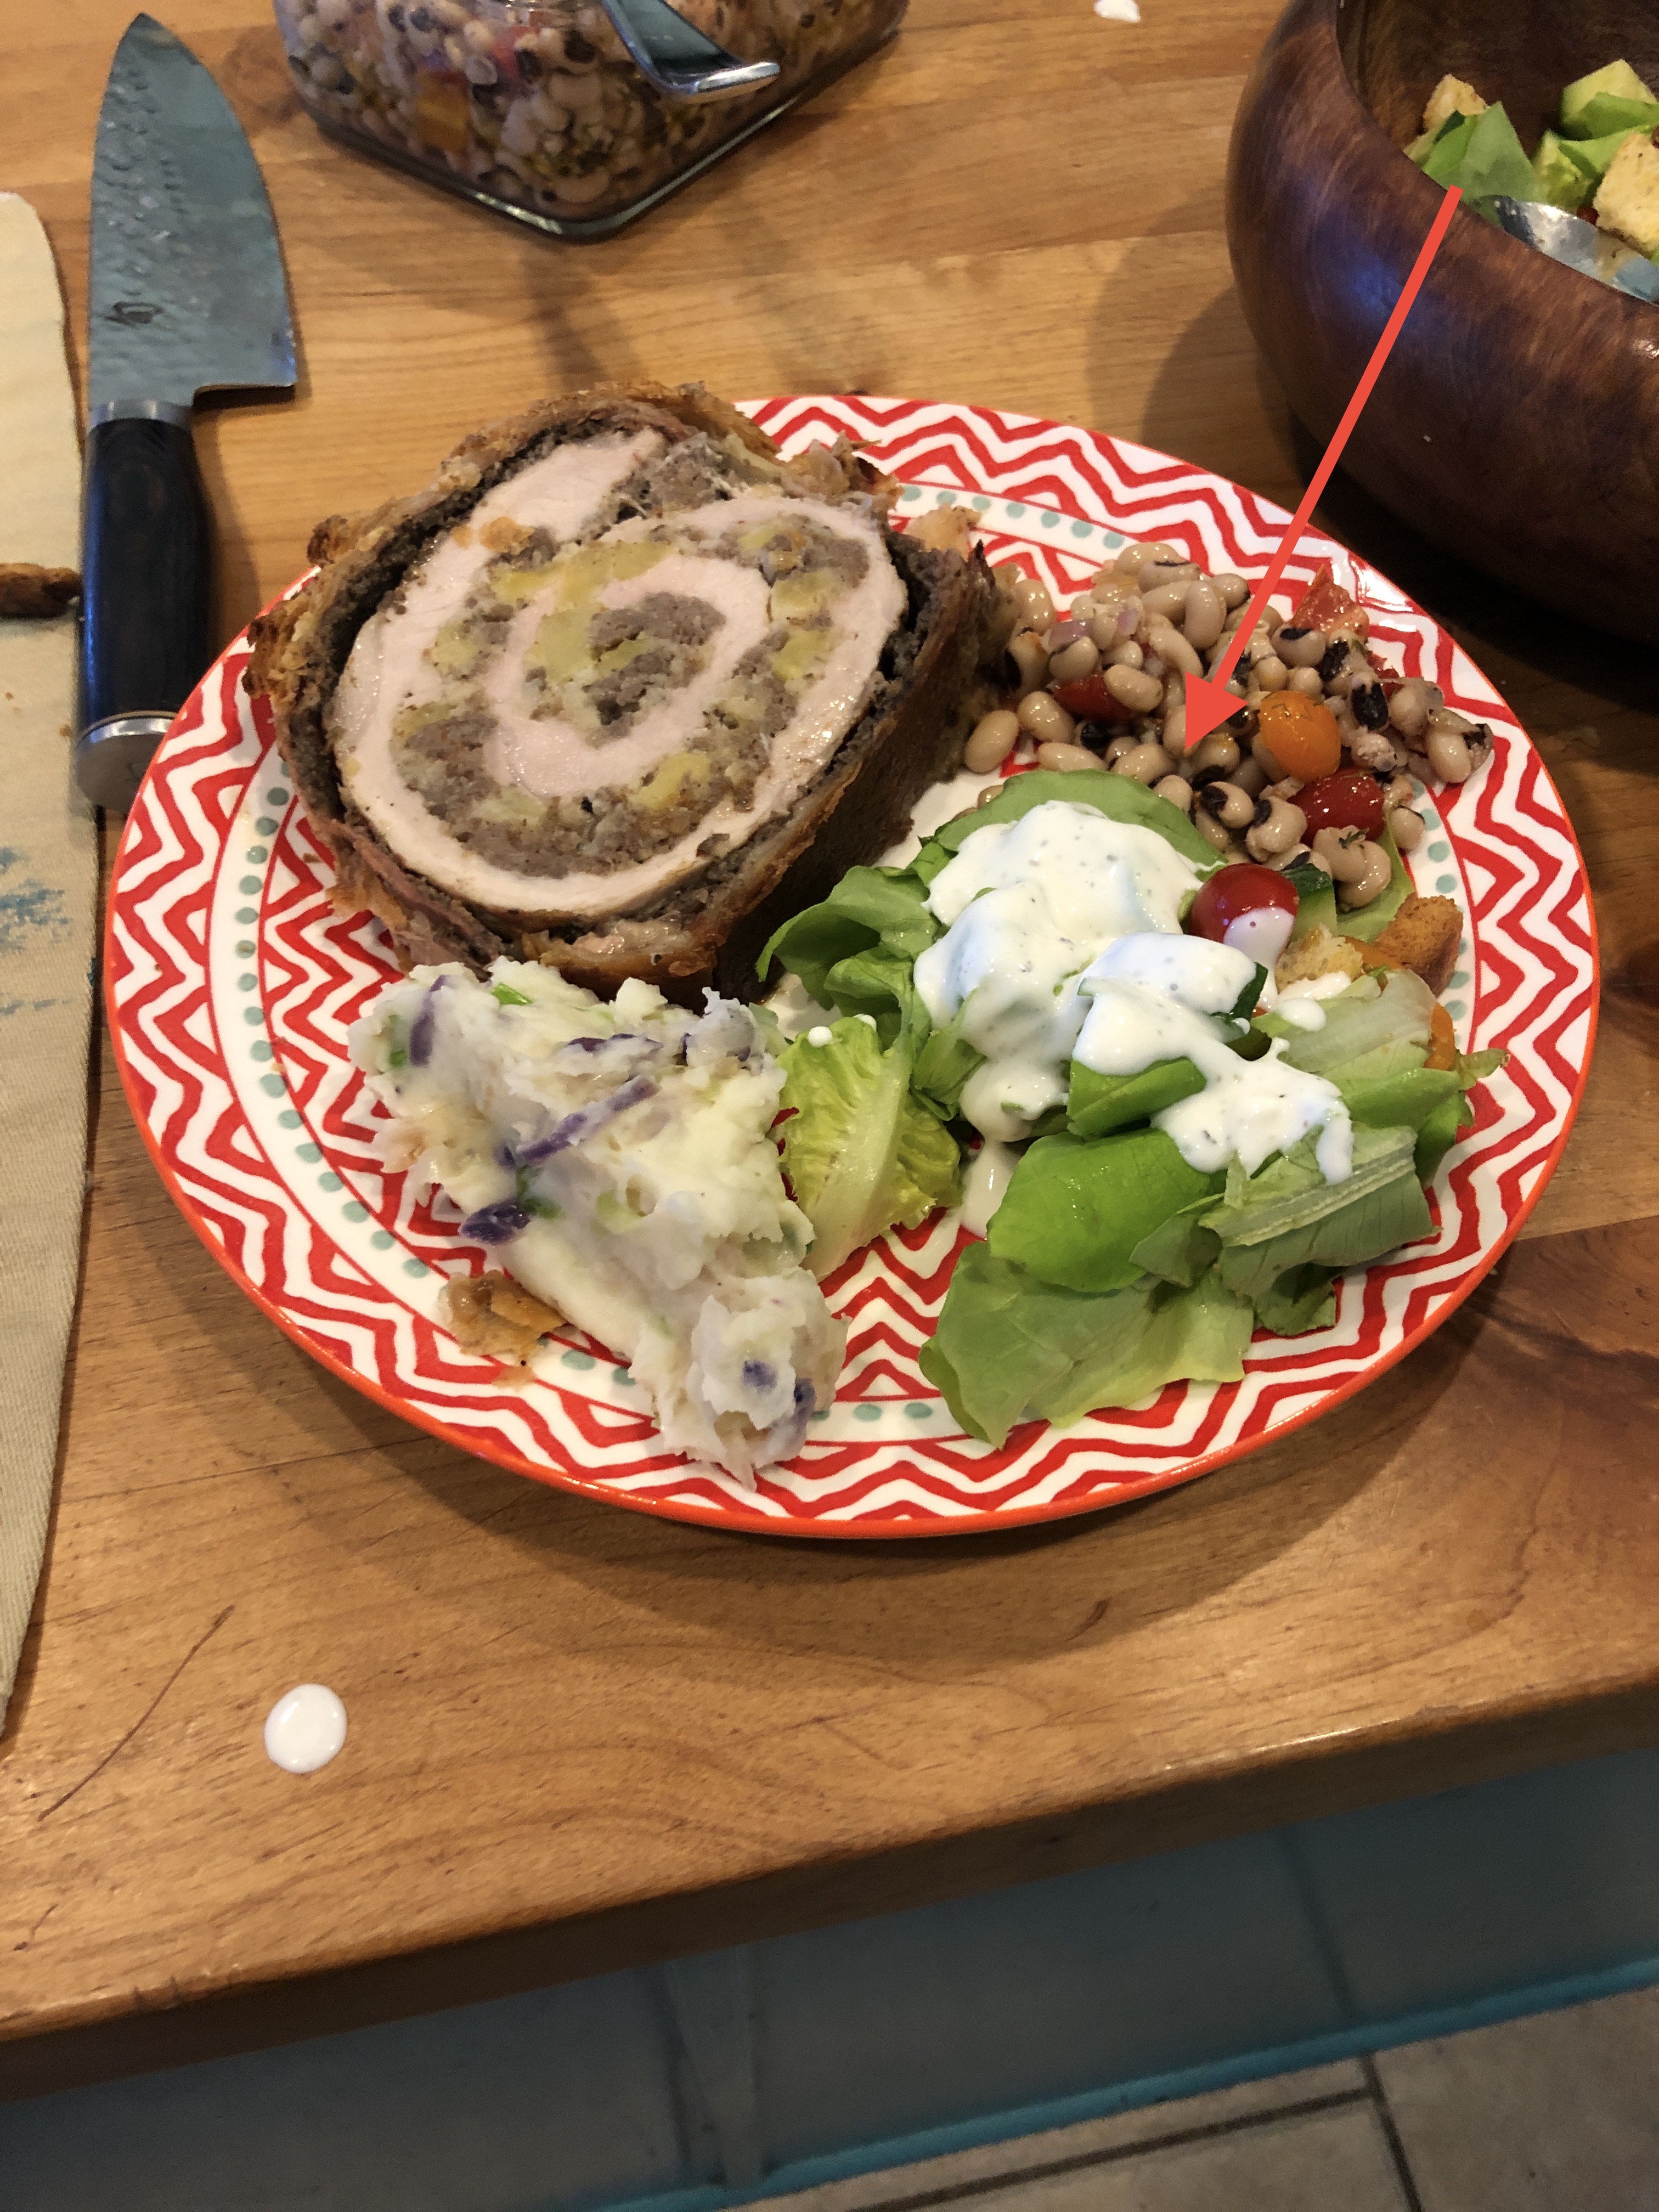
Mea culpa: I forgot to take a pic of the whole thing, but it was very pretty. This is a cross section on my plate. It was very rich, so I should have cut much thinner slices. Notice that we did have our New Years black eyed peas.
Day 3 (or day 2 after duxelles has fully cooled): Assemble the roll.
1 roll cut pork loin, about 3 pounds
½ pound pork sausage
2 large tart apples, peeled, cored, and cubed then tossed w/ lemon
½ cup panko bread crumbs 1 tbs rendered bacon fat
Prosciutto- I used about 10 thin slices. Have extra for patching up
1 egg beaten, w/ tsp water
Brown the sausage and break up into small pieces. When it is almost cooked, toss in apples and cook to just soften. If there is a large amount of liquid, drain it off. Add panko and taste for seasoning. This will depend on the flavor from the sausage. The panko is just to soak up juice from the apple as it cooks. Set aside to fully cool.
While the stuffing cools, roll cut the pork loin if this wasn’t done by your meat market. Pound to about ½ inch thick, being careful not to leave any holes. Season w/ salt and pepper and refrigerate for at least 30 minutes.
When stuffing is completely cool, layer it on one side of the pork loin and press down gently. Then roll from the short end to make a relatively tight spiral. Truss tightly with kitchen twine. Brown in hot bacon fat on all sides. Then place the entire roast in the fridge for about an hour until cool. Remove twine.
Lay out overlapping plastic wrap large enough to accommodate the circumference of your roast. Create a thin, overlapping sheet of prosciutto. It should be large enough to completely cover the roast when rolled up. The prosciutto is used in part to stop juice from the roast from wetting the pastry so it should have no holes or gaps. Put a thin layer of duxelles on the prosciutto leaving a ¼ inch strip at the edges clear. Place the cooled roast (with twine removed) in the middle of the duxxelles covered prosciutto. Use the plastic wrap to bring the edges of the prosciutto up and fold in the ends until the roast is completed sealed in it. Look for gaps in the ham and if there are any, spackle them over with additional prosciutto. Try to keep the entire roll tight. Use the plastic wrap to make a tight, neat log and refrigerate this overnight. The roast should be completely cold before enrobing in pastry.
Day 4: Roll rough puff pastry into a ¼ inch thick rectangle big enough to roll around your roast. Remove roast from plastic wrap and then bring the pastry up around the roast as you did with the prosciutto. Seal all edges with fingertips and place the pastry covered log on a baking sheet lined w/ parchment paper. (Seam side down). Score or decorate w/ excess pastry as desired. Refrigerate for 30 minutes.
Remove the pastry covered roast from the fridge. Insert a digital probe thermometer into the very center of the roll. Place in a 400F oven, then immediately reduce the temperature to 375. Cook until the center of the roast reaches 145F. Remove from the baking sheet asap so that the pastry isn’t sitting in any cooking juices. Allow to rest for 10 minutes, then slice into thick cross sections to serve.
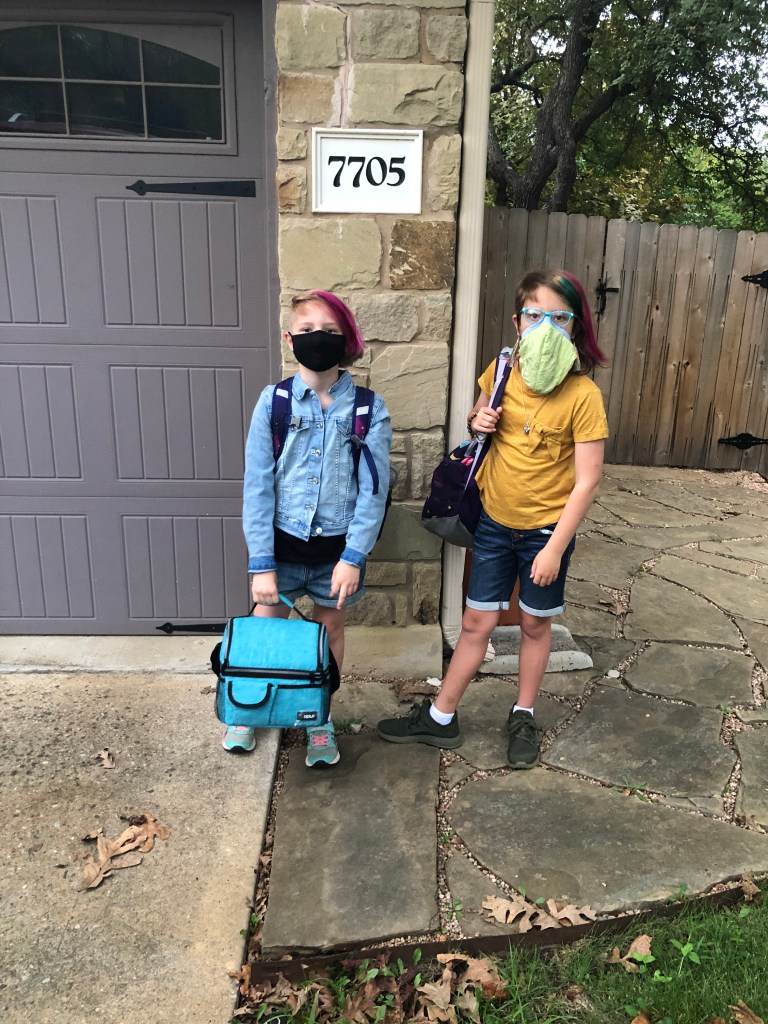
When I eat my feelings it’s usually a riff on something my mother and grandmother made back in the day. Chicken and dumplings are a staple of my childhood. In their world chicken and dumplings were just a poached chicken and Bisquick dumplings. Adding veg and tarting up a biscuit dough is somewhat treasonous. As always when I make something I’m particularly proud of, my kids wanted none of it. Whatever. One of them is addicted to boxed mac and cheese and the other frequently chews on painters tape. Not arbiters of all that is tasty.
We ate the C&D before I took a picture. So here are the comfort food rejectors on their first day of pandemic school.
Soup: 1 large white onion, peeled and diced 4 large garlic cloves, sliced 2 tbs rendered bacon fat 4 carrots, peeled and sliced into coins 1 heart of celery w/ leaves, sliced salt and pepper to taste ¼ tsp poultry seasoning 8 cups chicken stock 1 pound shredded chicken ¼ cup sour cream 1 tbs Dijon mustard
Dumplings: ¼ cup butter, melted 2 cups all purpose flour 4 tsp baking powder 1 tsp salt 1 egg, beaten black pepper, fresh ground 1 cup butter milk
Sauté onion in bacon fat. Add the garlic and cook until soft. Stir in carrots and celery, then add seasonings and stock. Cook until the carrots are soft, about 20 minutes. Stir in chicken, sour cream, and mustard. Reduce to a simmer.
Melt butter in a microwave proof bowl. Add all dumpling ingredients and mix to form a stiff dough. Drop dumplings off of a spoon into simmering soup, but be careful not to boil them or they’ll fall apart. Partially cover, and cook just simmering for about 20 minutes.
Delight. Utter delight. Even given that my kids were all ¯\_(ツ)_/¯ because their mission is to fully reject the only food culture I can give them.
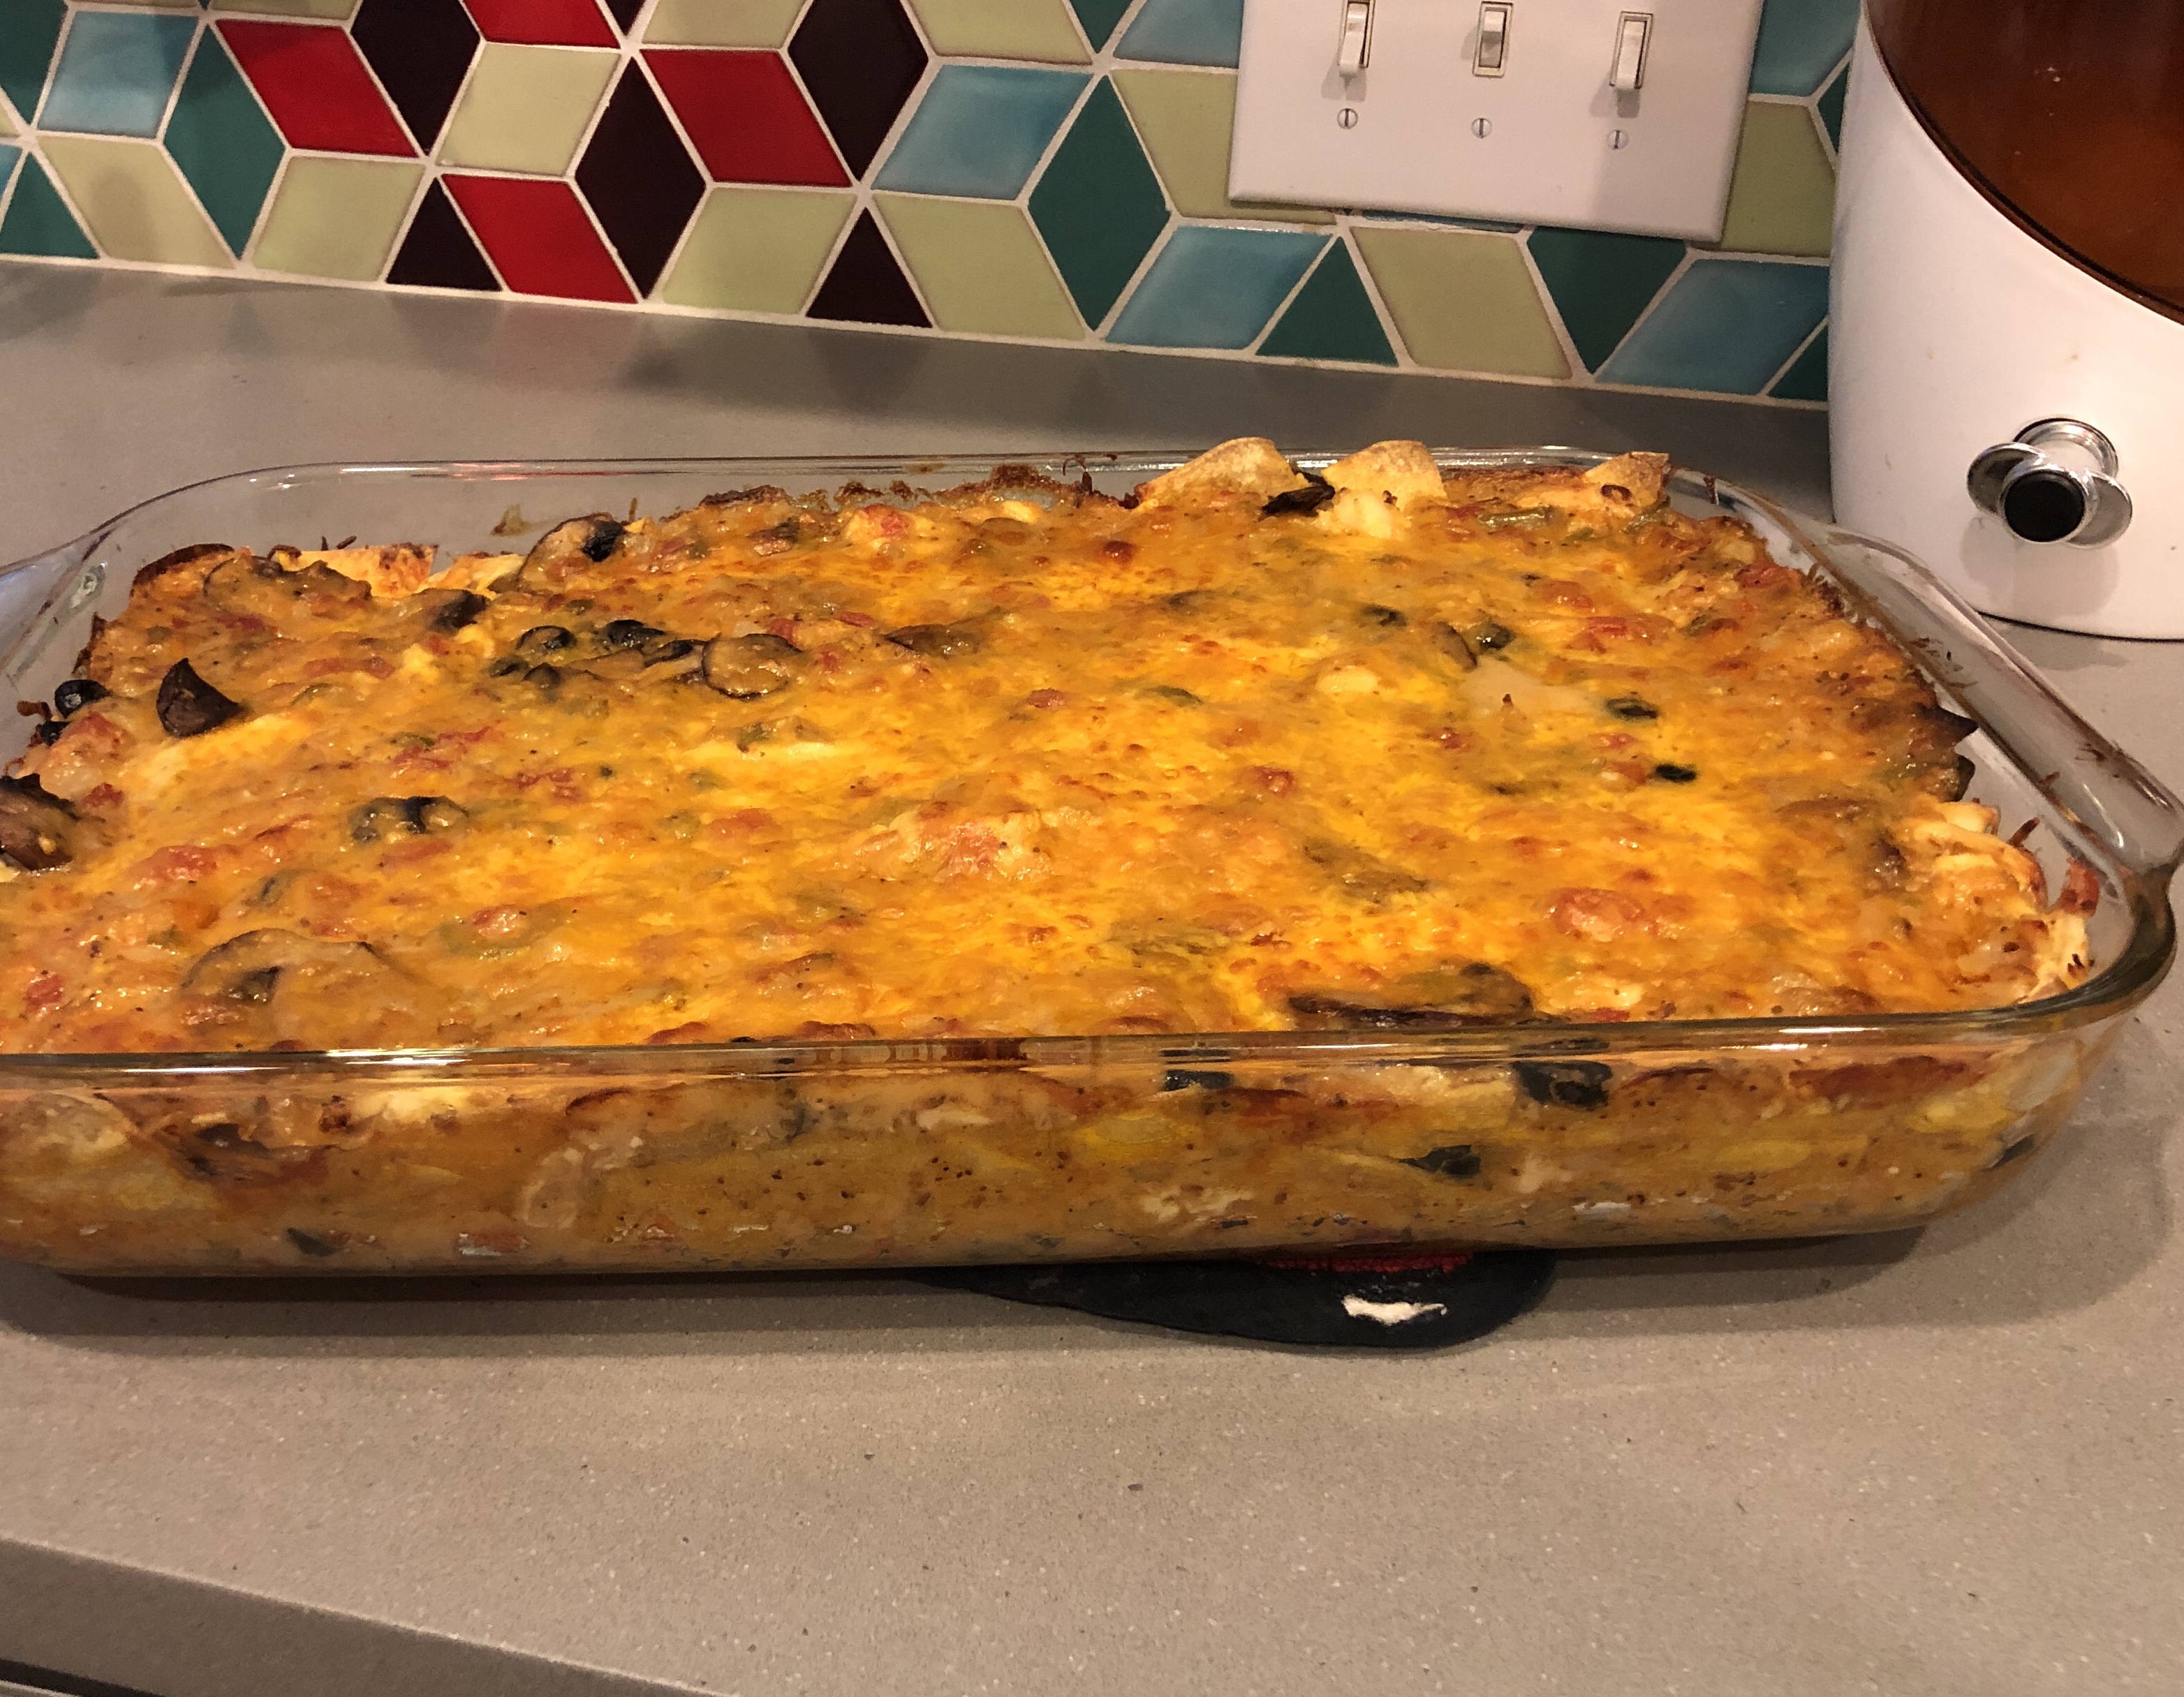
For those days when <waves hand> all of this is just too much to bear, but you’d still rather not ingest cream-o-chemical soup.
For the sauce:
1 tbs bacon fat
1 large sweet onion, diced
1 large green bell pepper, diced
4-6 garlic cloves, crushed
2 tsp cumin seeds
2 tsp chili powder
1 tsp celery seeds
2 tbs butter
3 tbs flour
2 cans low sodium chicken stock
1 15oz can stewed tomatoes w/ chiles
1/2 cup sour cream
salt and pepper to taste. (Maybe some ground cumin too. MOAR cumin!)
For the casserole:
1 sauce recipe as above
1 lb shredded chicken
1 lb sliced crimini mushrooms, sautéd in bacon fat
3.8 oz can of ripe olives, sliced
1 cup jack cheese, shredded
1 cup sharp cheddar cheese, shredded
20 corn tortillas, sliced in half
I generally sauté the mushrooms in bacon fat in a straight sided skillet and set them aside. Then in that pan, add some more bacon fat (Sorry… we’re not here for health today we’re here for the calming of existential dread) and soften your onions and bell pepper in that. Add the crushed garlic and stir through till soft. Then add all of the seasonings except the salt and pepper. Fry them until the kitchen smells like you might survive after all. Add the butter to melt, then add the flour and mix until it all forms a paste. Let that brown a little. Add the chicken stock and (well strained) tomatoes. Simmer until it thickens then turn off the heat and add the sour cream. Taste for salt and pepper. Decide it’s not quite right and add some ground cumin. Then maybe a little more cumin. This is the sauce! You did this to avoid cream of chemical shit storm in a can and it’s worth it.
Dump a little sauce in the bottom of a casserole dish (Mine was glass and 13×9). Then cover the sauce w/ tortilla halves. Layer on more sauce, some chicken, olives, mushrooms. Then more tortillas, then sauce, then chicken/olives/mushrooms, finish this layer with the jack cheese. MORE tortillas but instead of sauce go straight to chicken/olives/mushrooms. Then the rest of the sauce spread evenly over the top. Try to have a little more than 1/3 of the sauce left for this step. Sharp cheddar cheese on the now very saucy top. Cover with foil.
I generally make casseroles either the day before or at lunch time and refrigerate, then bang them in a 400 F oven covered for 45 minutes and uncovered until bubbly. About 15 minutes. This is a good time to go take a statin and some blood pressure meds. Check that your jeans are sufficiently stretchy.
Let it stand on the counter for a while so that it sets and you avoid pizza mouth blisters. Eat it. Keep eating until you either burst or stop feeling all of the feelings you don’t want to be feeling.
I based this on a beautiful chickpea plov recipe from 101cookbooks.com. This was a bit more quickly thrown together, but worked very well. I used white basmatti rice instead of brown since it cooks more quickly.
1 cup white onions, chopped
2 tbs olive oil
2 chicken breasts, diced
salt, pepper, paprika, chili flakes
1/3 cup black olives, diced
1/3 cup dill, chopped
1/4 chives, chopped
2 cups basmatti rice
1 tsp saffron threads
2 tsp kosher salt
2.5 cups chicken stock
Saute onions in olive oil at the highest heat level. Add chicken seasoned with salt, pepper, paprika, and chili flakes. Just brown. Turn off heat. Add chopped spices and olives in layers but do not mix with the chicken and onion mixture. Pour rice over the herb layer, still without mixing. Bloom saffron in chicken stock and add salt to the liquid. Pour over rice. The liquid should just cover the rice, if it doesn’t add water. Lock lid in place.
Select “rice.” On my Duo 6 quart, this brings up an un-adjustable 12 minute cycle. After the rice cycle is up, allow a natural pressure release of 10 minutes. If liquid still remains, do a quick 2 minutes on manual, with a quick release to follow. Serve with yogurt, if desired.
My daughters have come to expect a batch of muffins just about every week to serve as their school day breakfast. Occasionally instead of muffins I’m asked for stones (scones) but this week I had a bunch of strawberries and dewberries left over and needed to use them up. So in a muffin they went. I had hoped the muffins would be a cheery pinkish purple color and the batter was just so. I added the jam partially for color’s sake and partially because my berries weren’t terribly sweet. They baked out to a fairly uniform white shade though so if you’re inclined and not averse a drop or two of pink food coloring wouldn’t go wrong.
These turned out ridiculously tender and buttery with a nice thin crust to the tops. I set two of them out under a pie safe and the rest go in a gallon baggie in the freezer to be doled out from Monday to Friday.
Makes 15 muffins.
Mixed Berry Muffins
2 cups white flour
3/4 cup white sugar
2 1/2 tsp baking powder
1 tsp kosher salt
2/3 cup butter, melted
2 eggs, beaten
1/4 cup sour cream
1/2 cup buttermilk
1 2/3 cup fresh mixed berries, chopped
2 tbs blackberry (dewberry) or strawberry jam
Preheat oven to 425. Dice berries and combine with jam. Add all other ingredients and stir, just to combine. Portion out into lined muffin tins. Bake for 18 minutes or until a toothpick comes out clean.
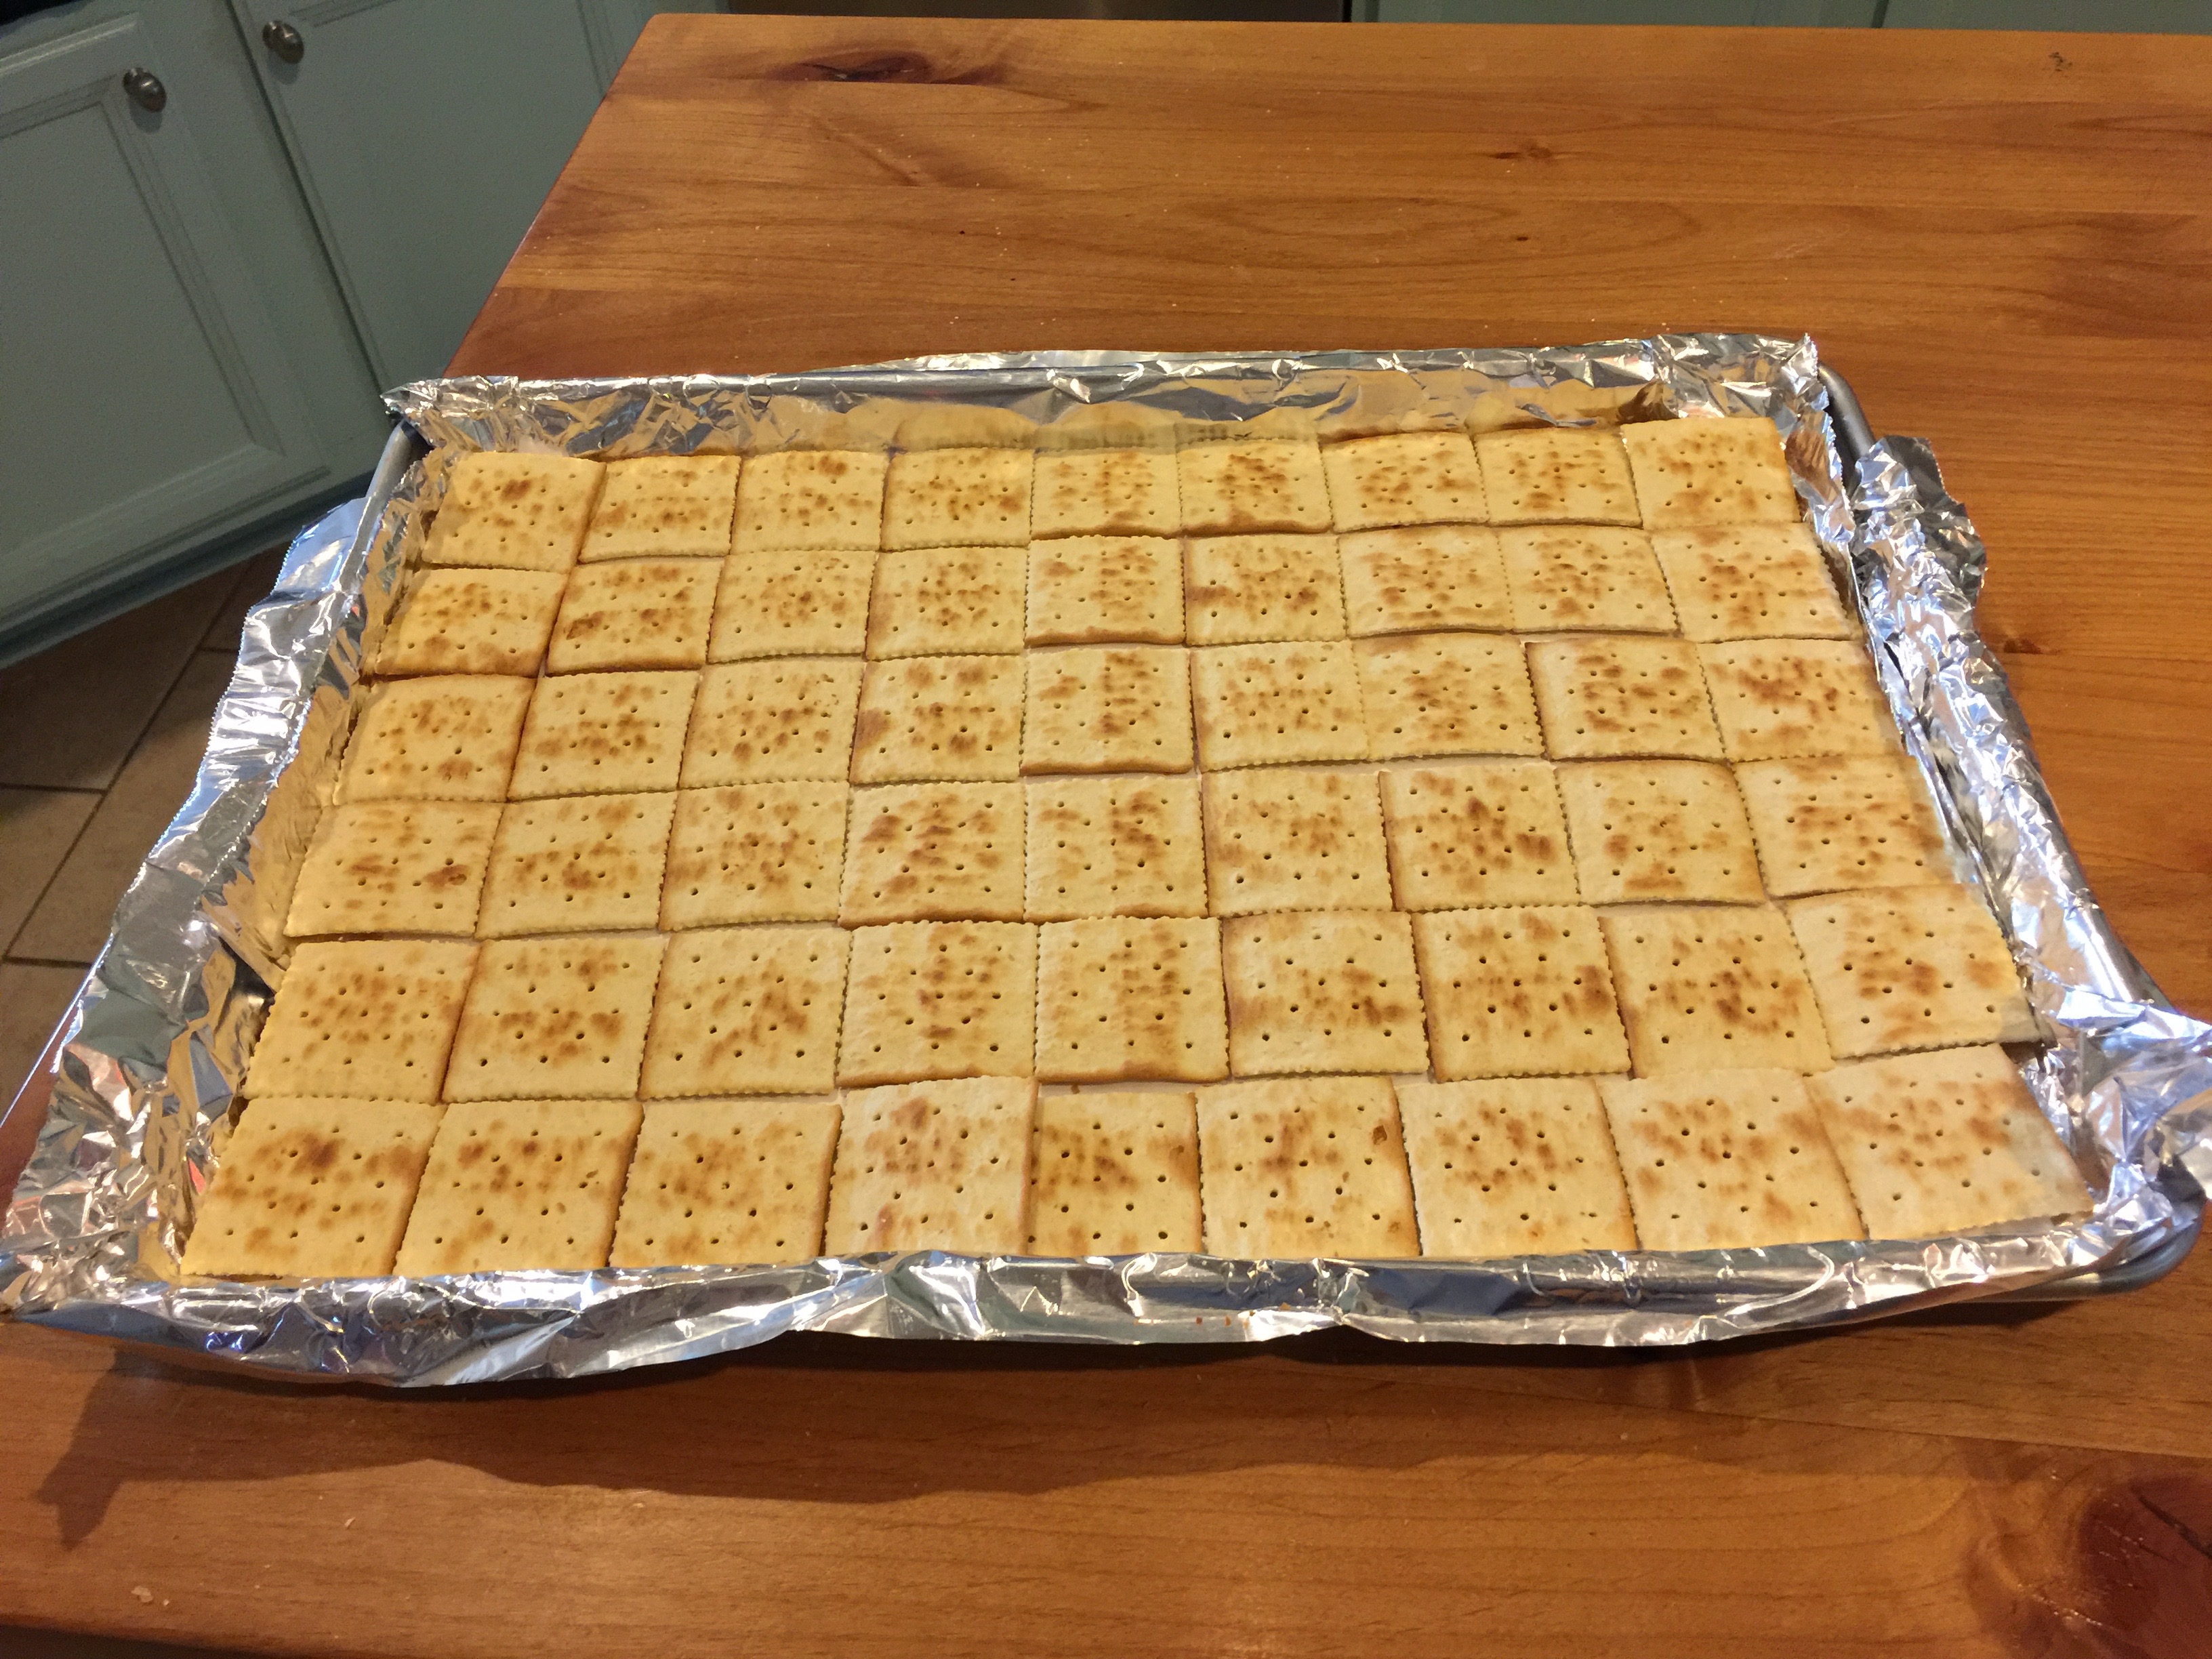
Southern cooking relies on ingredients that are a.) Cheap, b.) tasty, and c.) generally pretty terrible for your body. Saltine Toffee historically meets all of those criteria. It’s often a Christmas cookie treat, but it’s one of my go to treats to send along on trips and as a gift.
Start by lining a sheet pan with saltine crackers. I line with foil for the mess and a sheet of parchment paper to stop the candy from sticking to the foil. Who wants to eat little bits of foil? (Foil sounds like f-oh-l when I say it, if that helps.)
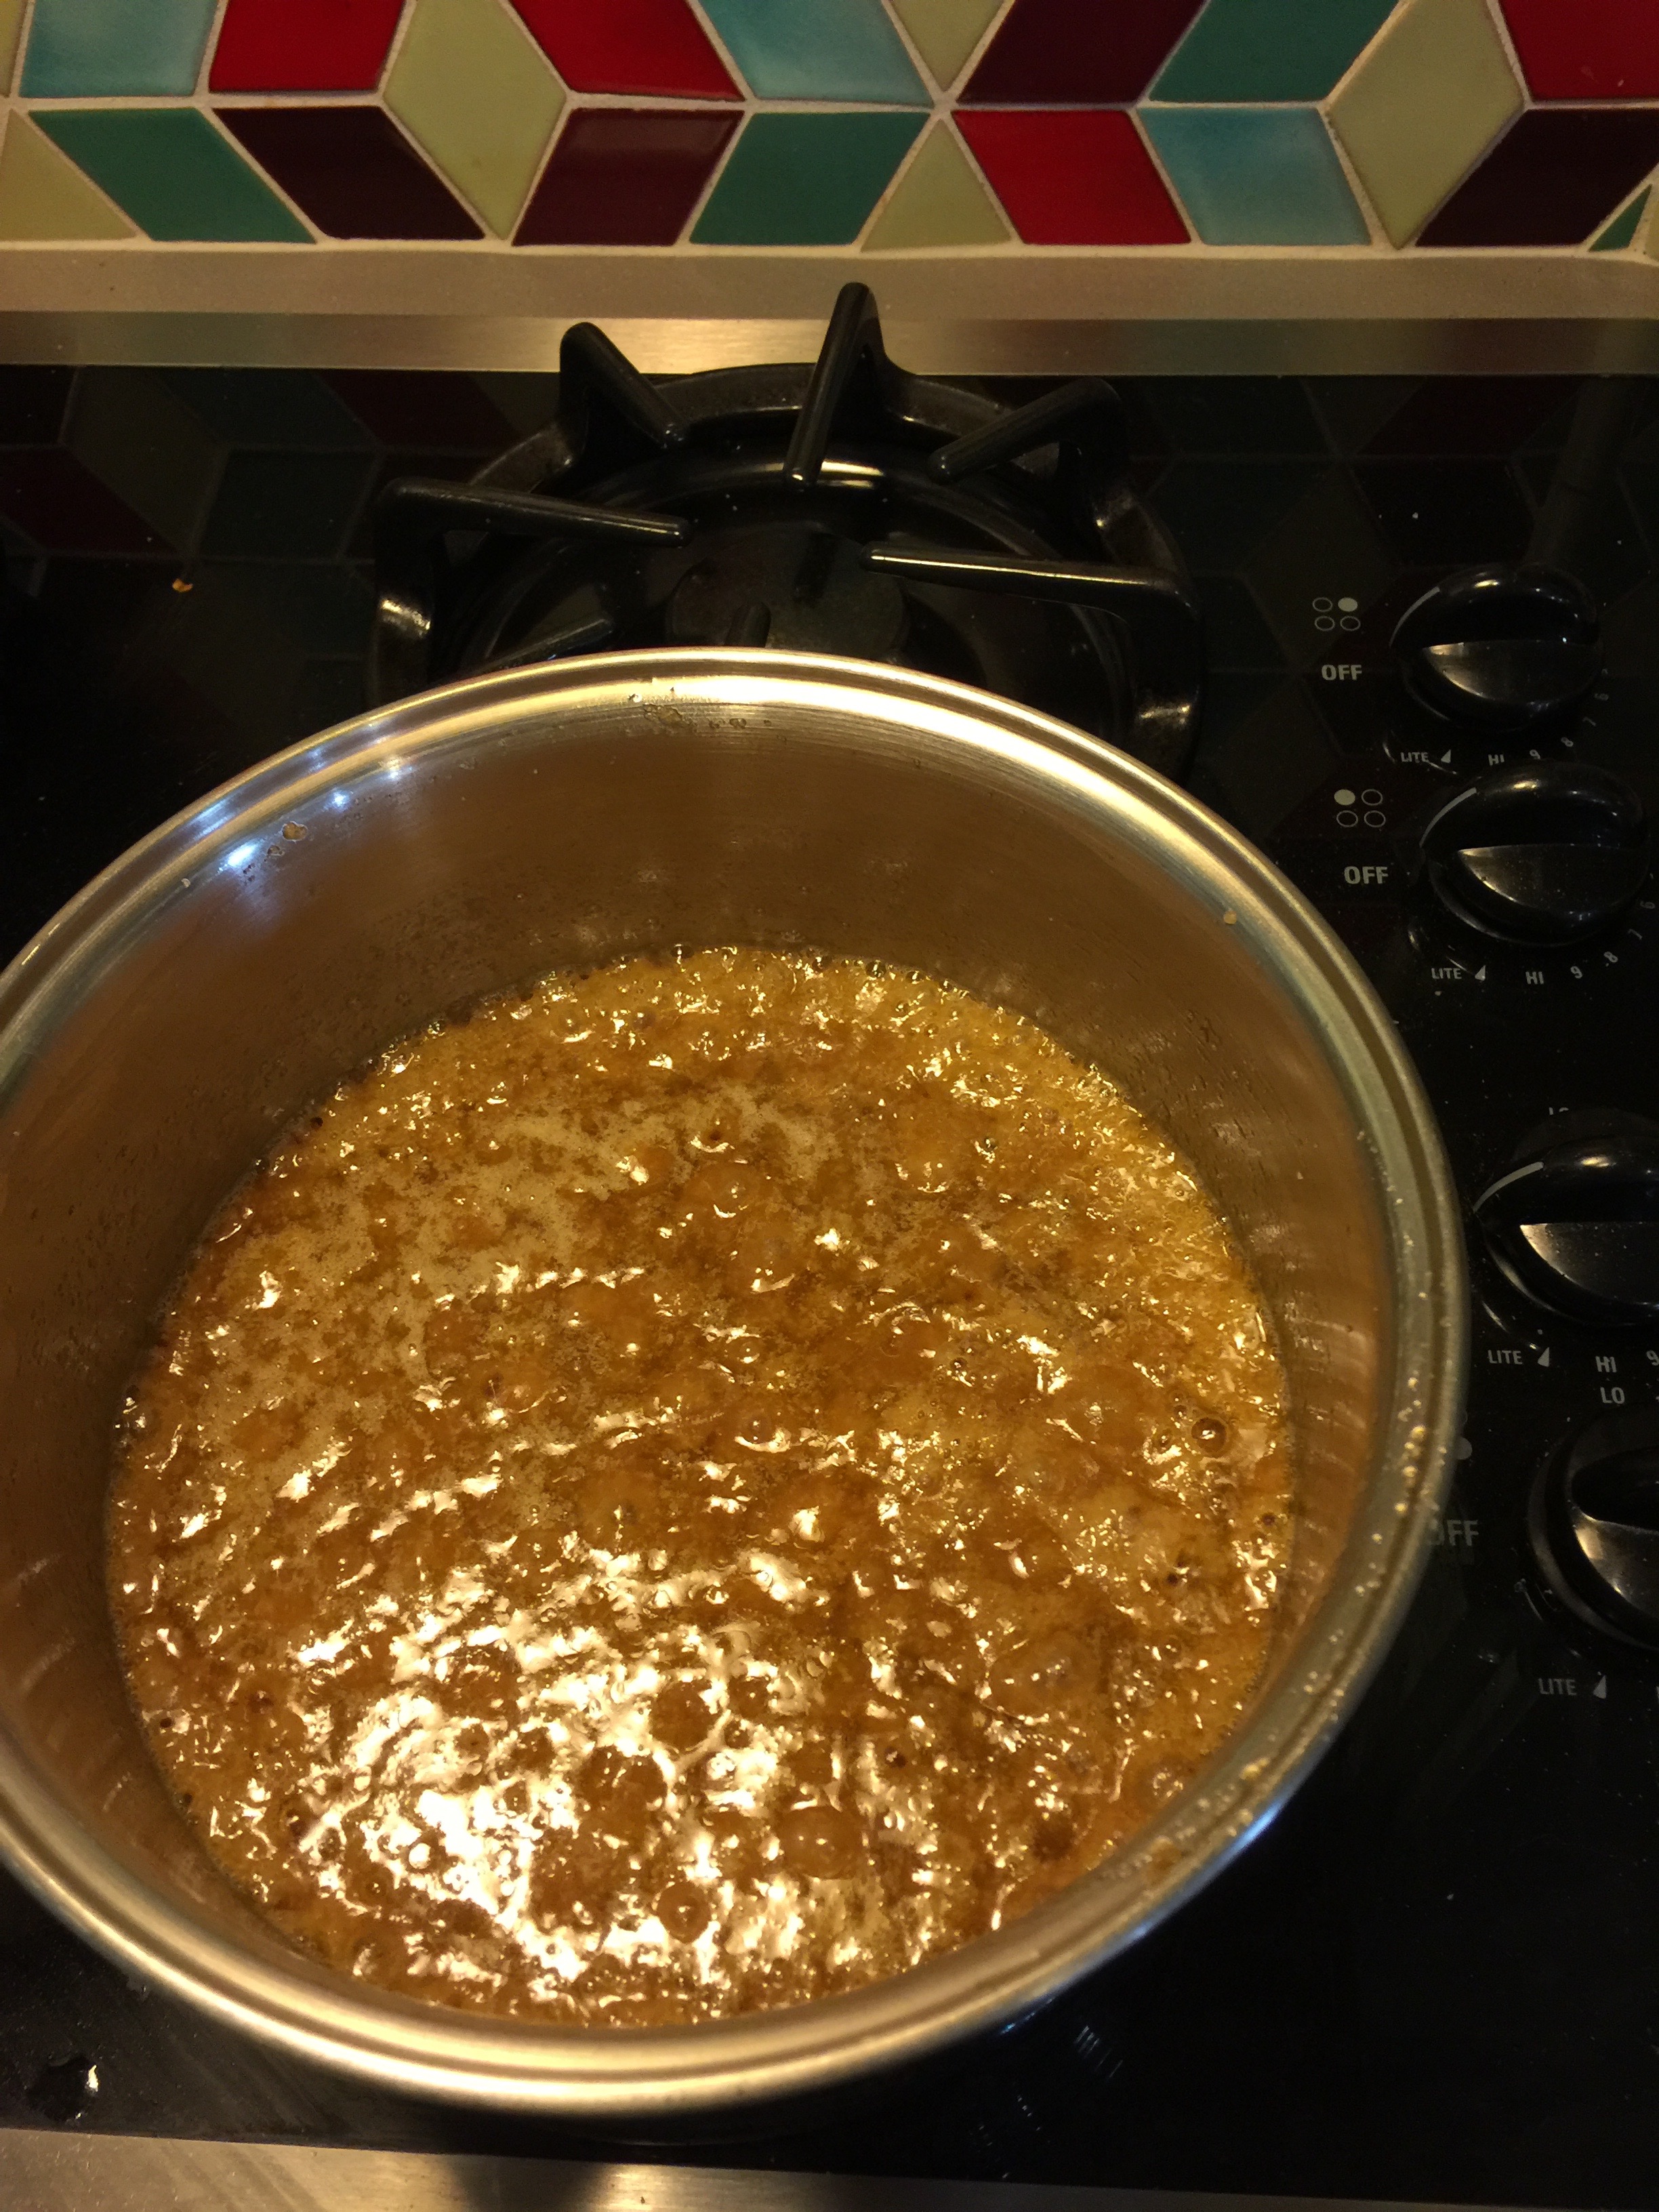
In a heavy bottomed sauce pan, bring butter and brown sugar to a boil. Stir to keep the sugar from burning for 3 minutes.
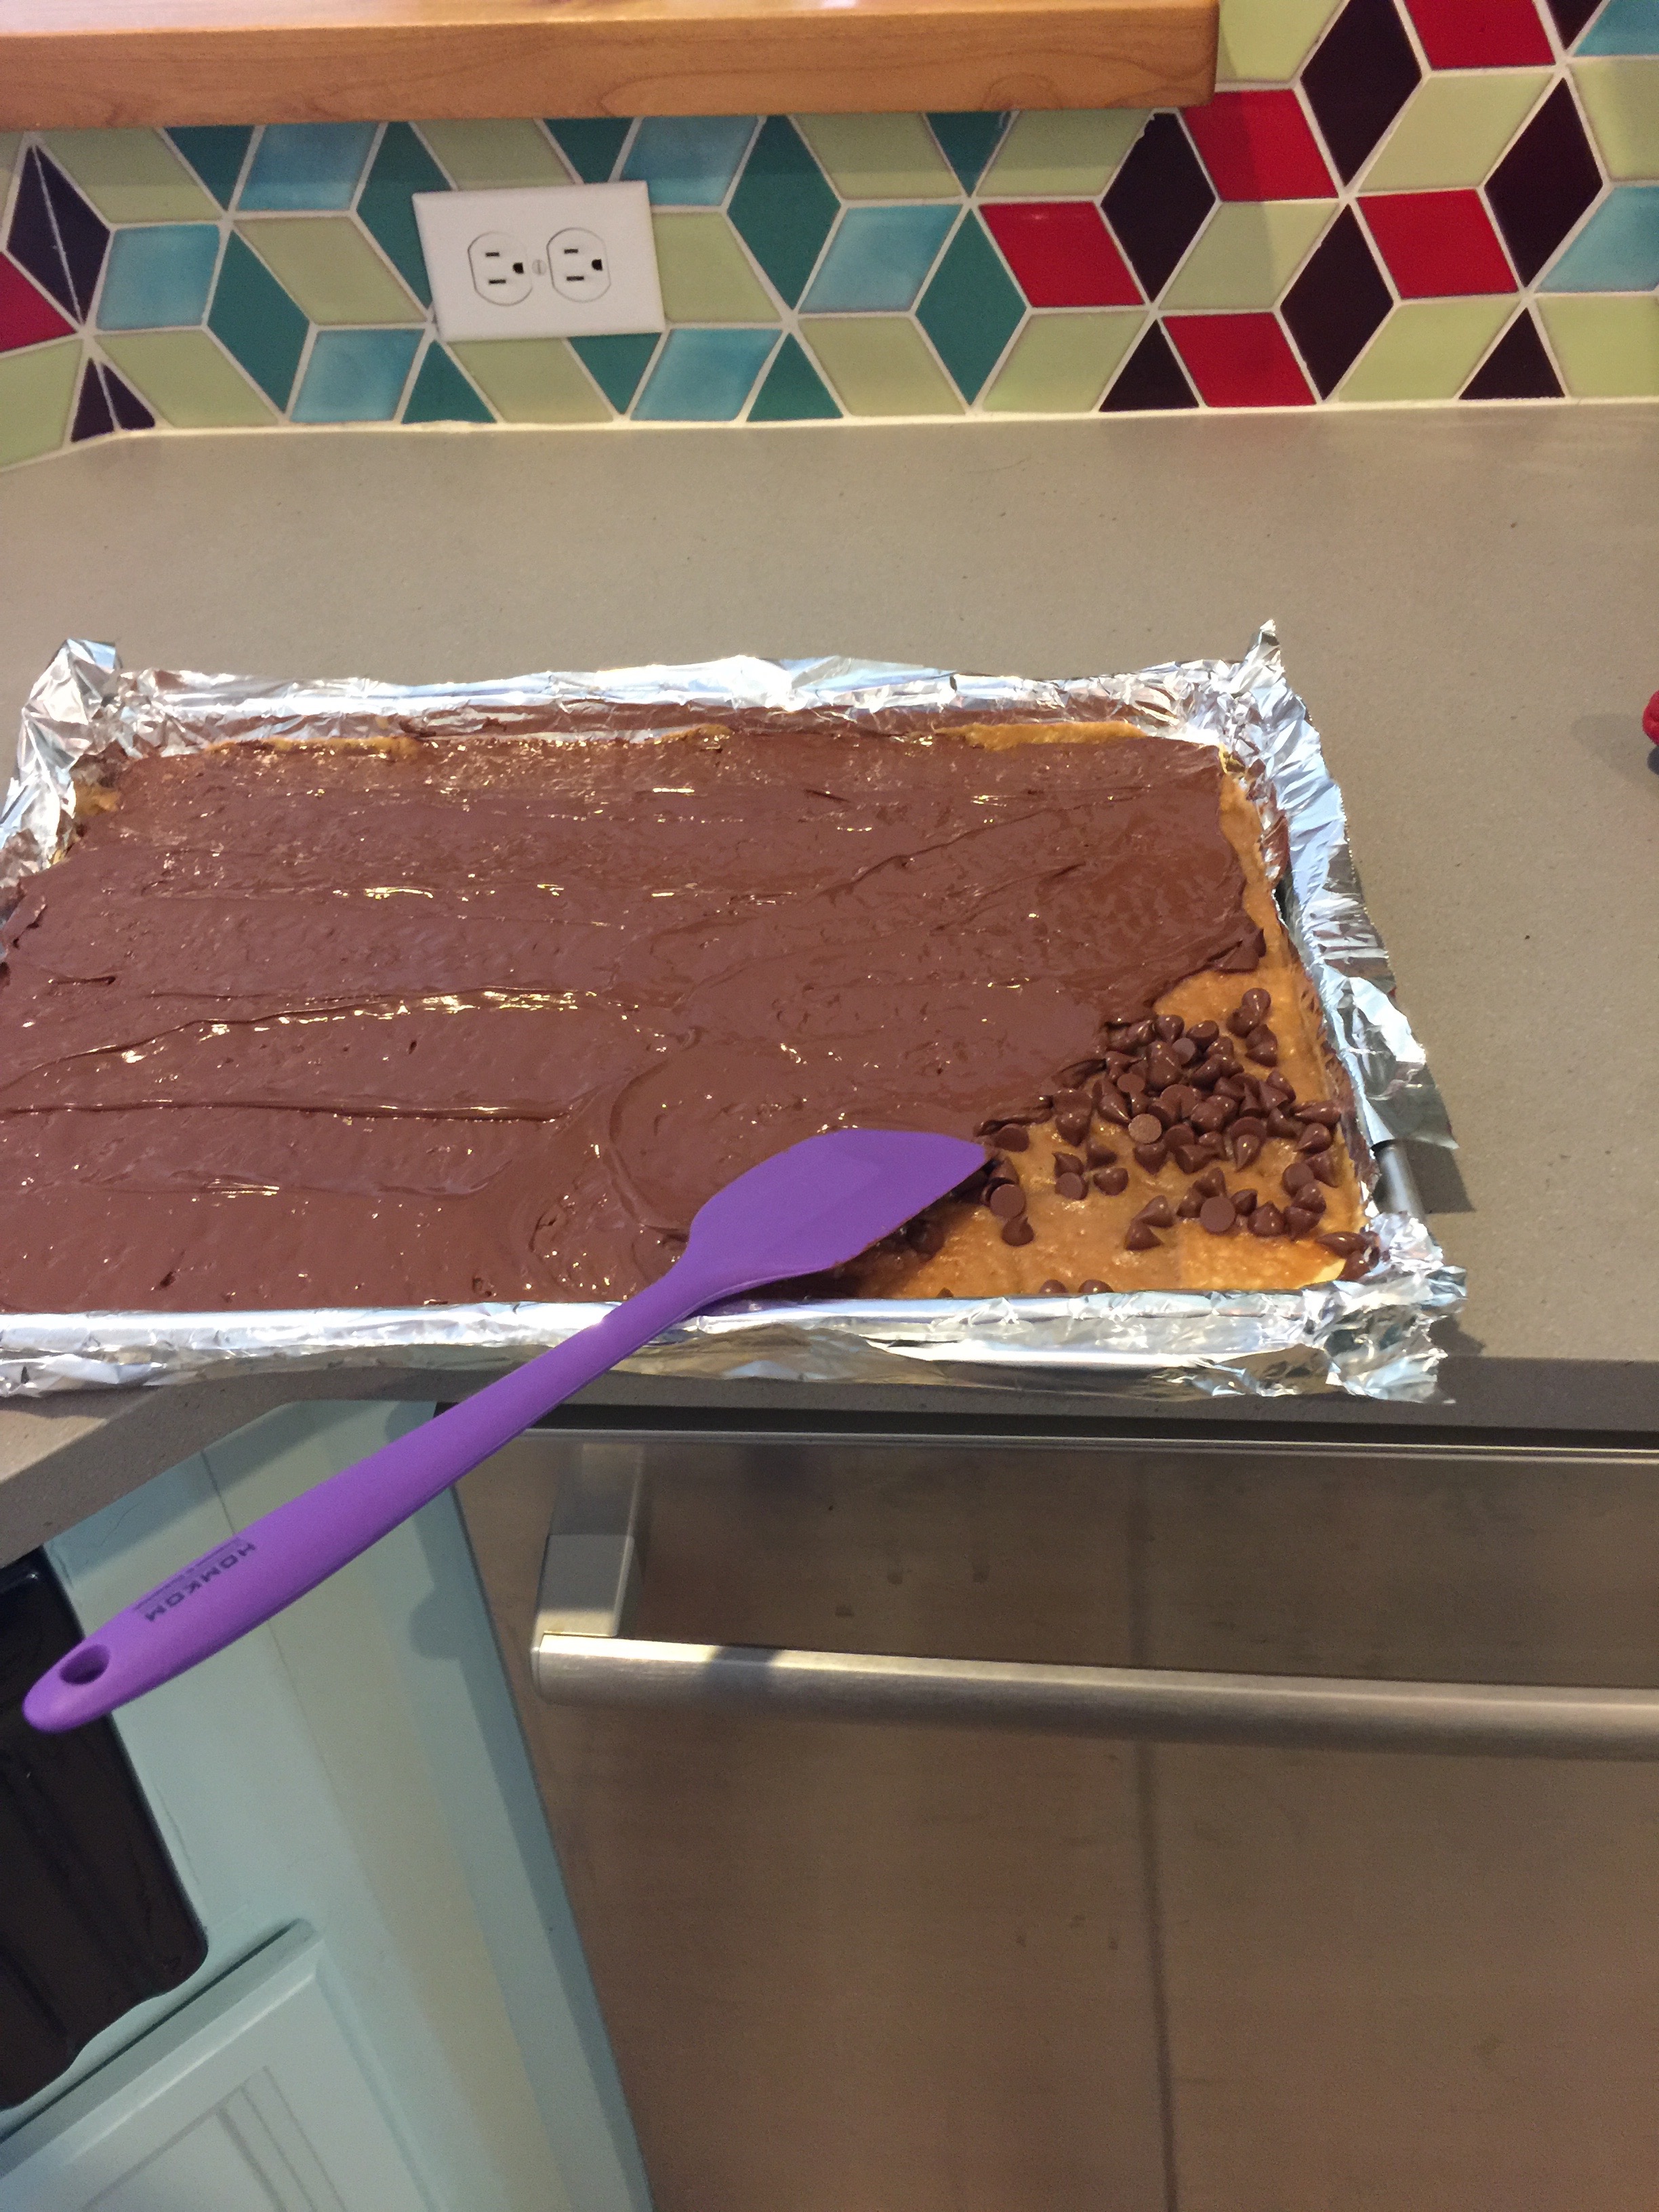
Pour the boiled sugar mixture over the crackers (it will plop, more than stream) and spread evenly.
Bake in the oven at 425 for 5 minutes until the sugar mixture is hot and bubbling, then remove and immediately sprinkle with chocolate chips. I’m a stickler for fair trade chocolate because imho, child slavery tastes bad. Cover with foil and let sit for 5 minutes until the chocolate has melted, then spread the chocolate out across the toffee crackers. I top it with pecans, because Central Texas, but it’s good as is or even with crushed peppermint.
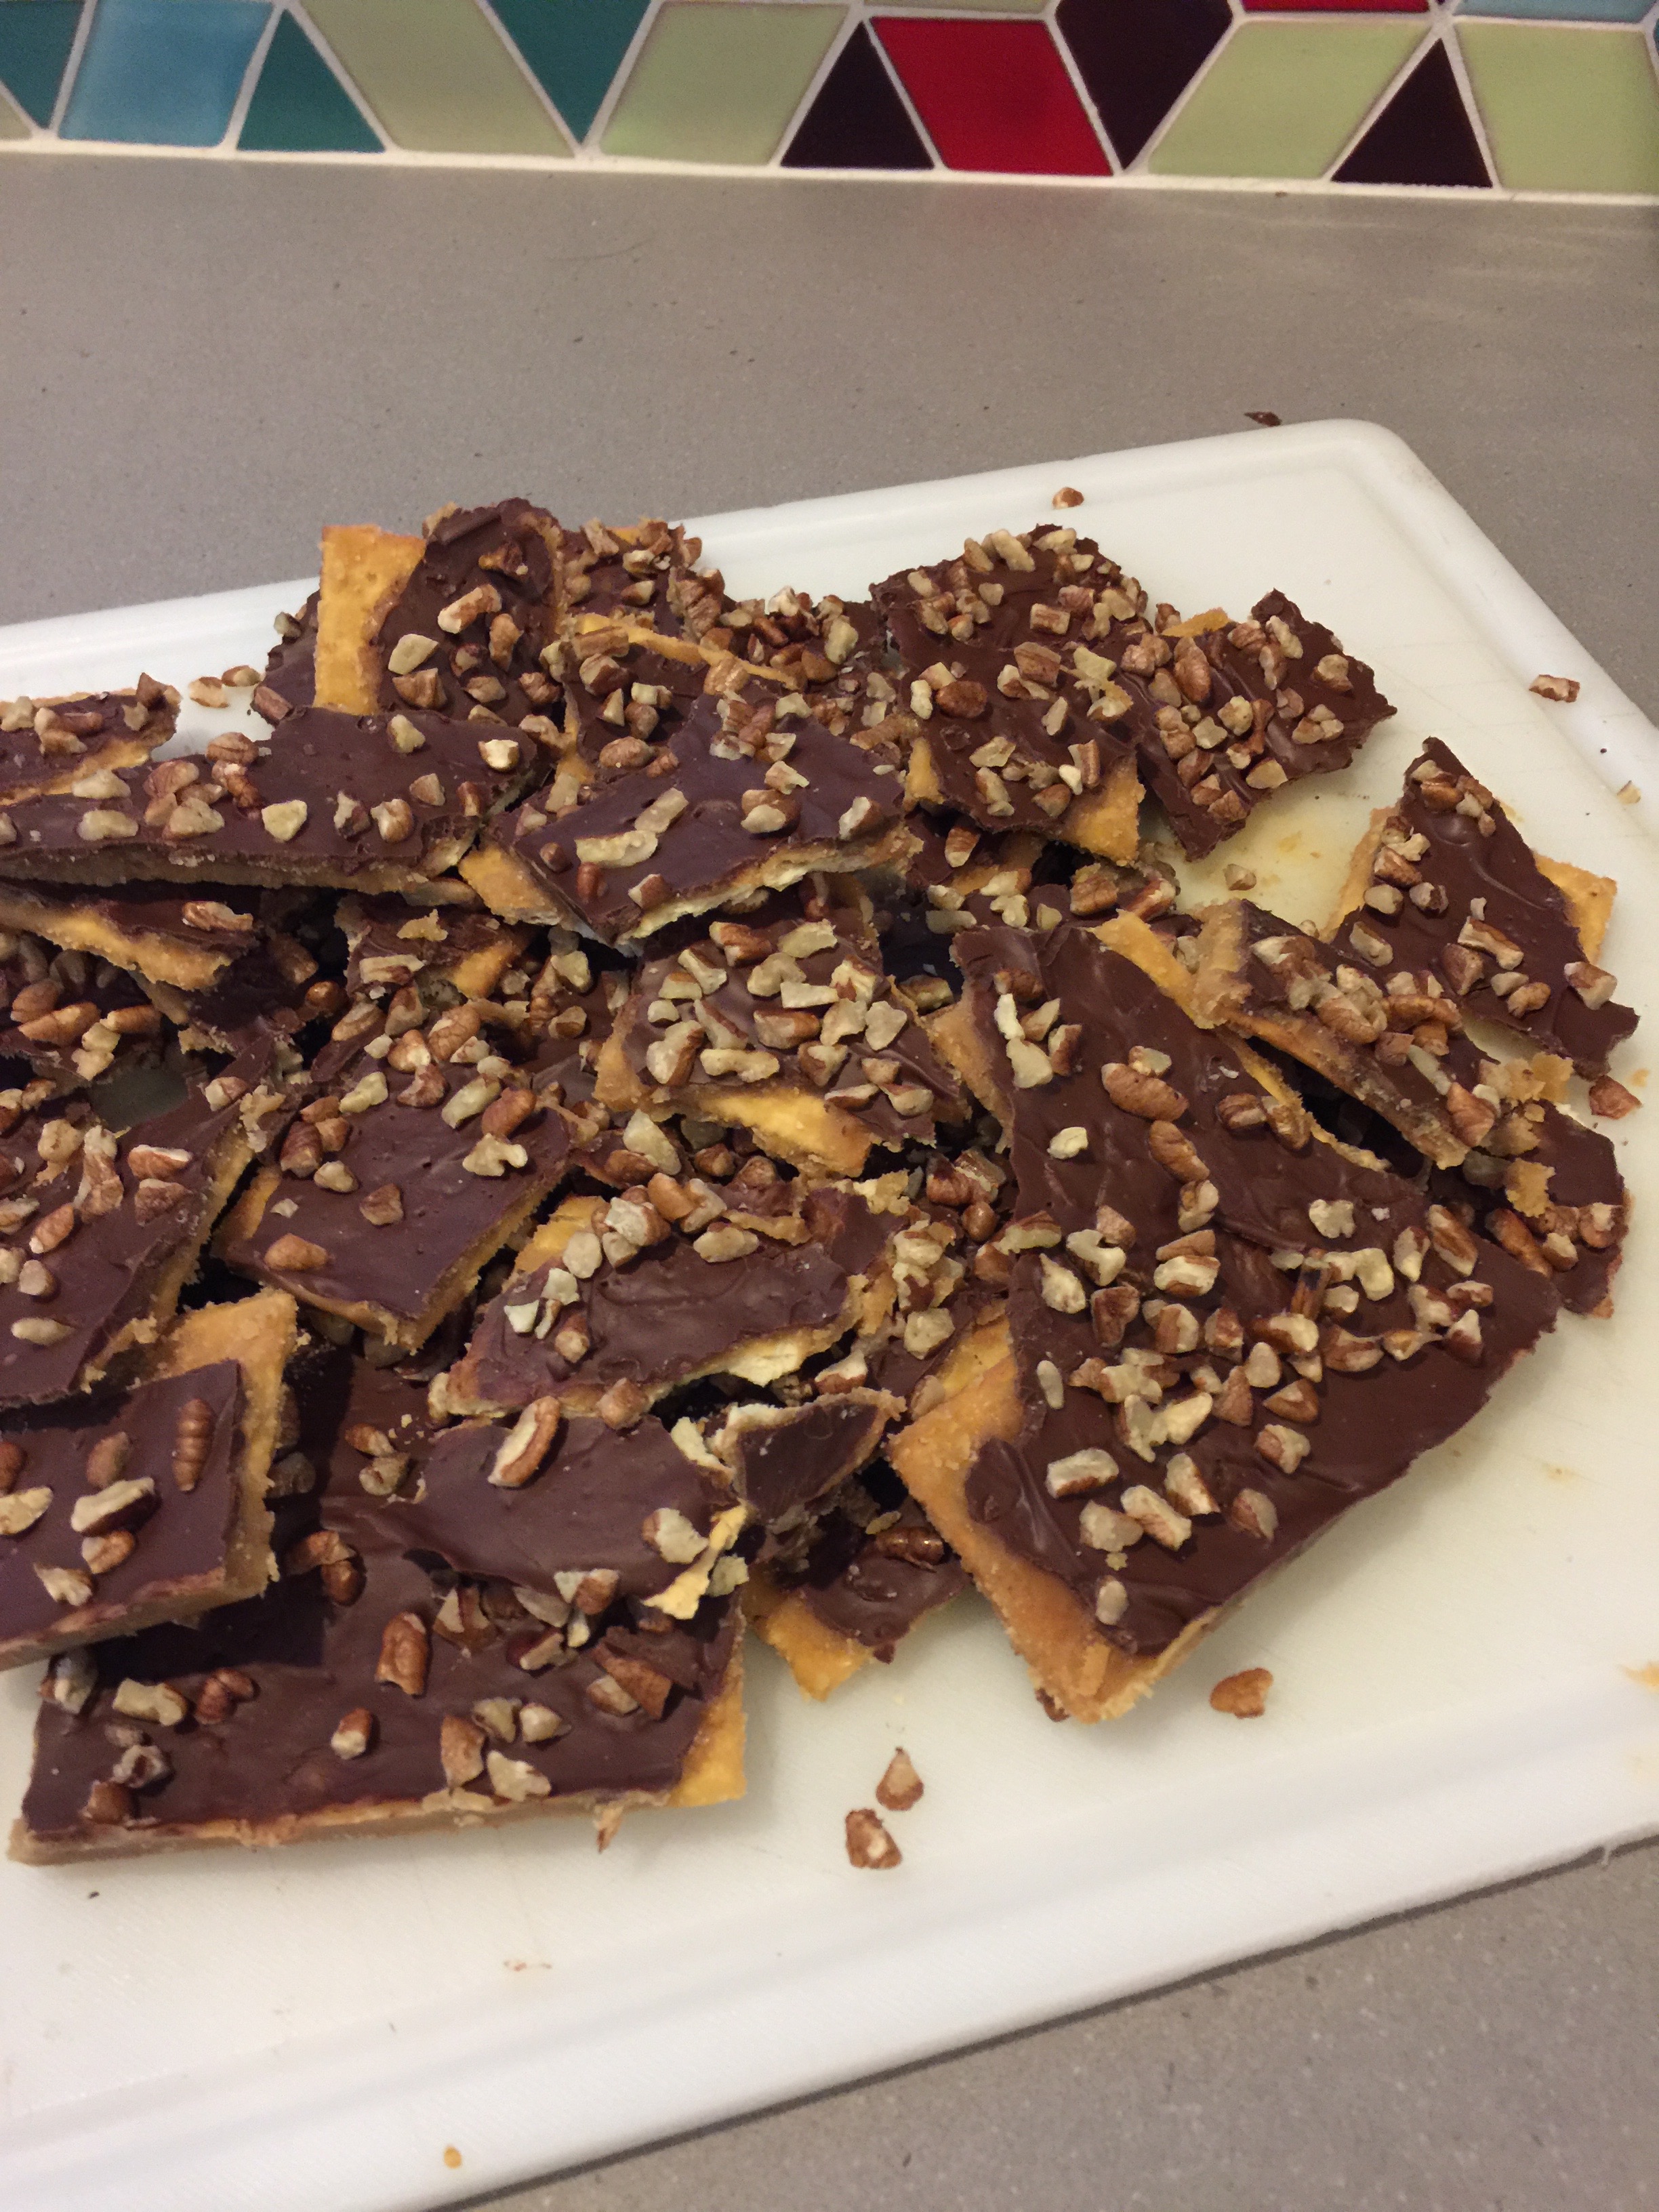
Refrigerate until cool, peel the candy from the lined pan and break into bite sized pieces.
Saltine Toffee:
Soda crackers, about 50
1 cup dark brown sugar
1 cup salted butter
2 cups fair trade semi sweet chocolate chips
3/4 pecans
Preheat oven to 425. Cover a lined baking sheet with soda crackers, leaving as little gap as possible. Place butter and brown sugar in a heavy sauce pan and bring to a boil for 3 minutes. Pour boiling sugar mixture over crackers and place the sheet pan in the oven. Bake for 5 minutes or until bubbling. Remove from heat and immediately cover with chocolate chips. Cover and allow to sit for 5 minutes. Spread melted chocolate chips with a rubber spatula and then top with pecans if desired. Place the sheet pan in the refrigerator for 15 or 20 minutes until cool. Break into serving pieces. Best fresh while the crackers are still crisp, but can be stored in an air tight container.
I don’t normally talk in such definitive terms but: We’ve all been making Buckeye Balls incorrectly for the entirety of man kind. It’s true. The correct recipe follows.
1 (6.5oz) container of PB2 with chocolate
1/2 of the same container filled w/ powdered sugar
2 tbs virgin coconut oil
6 tbs dark spiced rum
3 tbs coconut coffee creamer
chocolate bark, melted
In the bowl of an electric mixer using the paddle attachment, lightly mix PB2 and powdered sugar. Mix in the coconut oil and blend for about a minute until it’s even distributed through the bowl. Add in the rum, 1 tbs at a time, until the batter has a sufficient rum taste but doesn’t knock you over. Then add the coconut creamer until the mixture just comes together. You might not use all of the creamer. It should look like this:
Roll the dough into balls worth one or two bites. Refrigerate them for half an hour. Melt chocolate bark by the directions provided (Or make your own using your favorite chocolate and a scoop or two of shortening. I was lazy today.) Cool until you can just touch the chocolate enough to work with. Swirl each dough ball into the chocolate bark, and then set on a lined cookie sheet.
Refrigerate until set, then serve. Then thank me. Often. I’m freezing them and sending them to Costa Rica, because I want to be that far away from their magnetic wonderfulness.